


どうも、開発2部でサーバ担当してる山本です。
サーバチームでは毎週勉強会を行っていて、
今回nginxでリバースプロキシとロードバランサを構築したのでその内容を紹介したいと思います。
オーツーでは研修用にクラウドサービスを契約しており、
今回はそのクラウド上に環境を構築しました。
リバースプロキシ
リバースプロキシの構築では、リバースプロキシ1台とwebサーバ2台を用意し、
リバースプロキシにグローバルIPを設定し、
異なるドメインのリクエストをそれぞれのwebサーバに振り分けます。
実際の現場でも社内にある開発用のVMを公開する際に
リバースプロキシを使って環境の切り分けを行っています。
webサーバの設定
yumでhttpdをインストールし、ワーニングを取り除いて起動します。
2台のwebサーバとも同じ手順で構築し、それぞれweb01,web02とします。
# yum install httpd
# vi /etc/httpd/conf/httpd.conf
ServerNameがデフォルトだとワーニングが出るのでとりあえず設定します。
httpd.confの変更内容
ServerName localhost:80
# chkconfig httpd on
# apachectl start
リバースプロキシの設定
nginxをインストールし、各webサーバへの振分けの設定を行います。
# vi /etc/yum.repos.d/nginx.repo
nginx.repoの内容
[nginx]
name=nginx repo
baseurl=http://nginx.org/packages/centos/$releasever/$basearch/
gpgcheck=0
enabled=0
# yum install nginx –enablerepo=nginx
# vi /etc/nginx/conf.d/rev_proxy.conf
rev_proxy.confの内容
#### web01
server {
listen 80;
server_name test1.otwo-study.com;
proxy_set_header Host $host;
proxy_set_header X-Forwarded-For $proxy_add_x_forwarded_for;
proxy_set_header X-Forwarded-Host $host;
proxy_set_header X-Forwarded-Server $host;
proxy_set_header X-Real-IP $remote_addr;
location / {
proxy_pass http://172.18.0.105/;
}
}

#### web02
server {
listen 80;
server_name test2.otwo-study.com;
proxy_set_header Host $host;
proxy_set_header X-Forwarded-For $proxy_add_x_forwarded_for;
proxy_set_header X-Forwarded-Host $host;
proxy_set_header X-Forwarded-Server $host;
proxy_set_header X-Real-IP $remote_addr;
location / {
proxy_pass http://172.18.0.132/;
}
}
webサーバへの振分けの設定です。
test1.otwo-study.comでアクセスされたらweb01(172.18.0.105)へ、
test2.otwo-study.comでアクセスされたらweb02(172.18.0.132)へという内容です。
proxy_set_headerはバックエンドのwebサーバに接続元のIP等の情報を引き渡すための設定です。
# vi /etc/nginx/conf.d/default.conf
default.confの変更内容
server_name localhost default;
test1.otwo-study.com、test2.otwo-study.com以外で
アクセスされた場合のデフォルト挙動を設定します。
# vi /etc/nginx/nginx.conf
nginx.confの変更内容
# include /etc/nginx/conf.d/*;
include /etc/nginx/conf.d/rev_proxy.conf;
include /etc/nginx/conf.d/default.conf;
rev_proxy.confとdefault.confだけを明示的にincludeします。
# chkconfig nginx on
# /etc/init.d/nginx start
名前解決の設定
ちゃんとした開発環境ではサブドメインで切り分けたりしますが、
今回は勉強会のためだけなので、クライアントのhostsファイルを編集して名前解決を行います。
クライアントがwindowsなので、C:\Windows\System32\drivers\etc\hostsに追記します。
hostsの追記内容
xxx.xxx.xxx.xxx test1.otwo-study.com
xxx.xxx.xxx.xxx test2.otwo-study.com
xxx.xxx.xxx.xxxはリバースプロキシのグローバルIPになります。
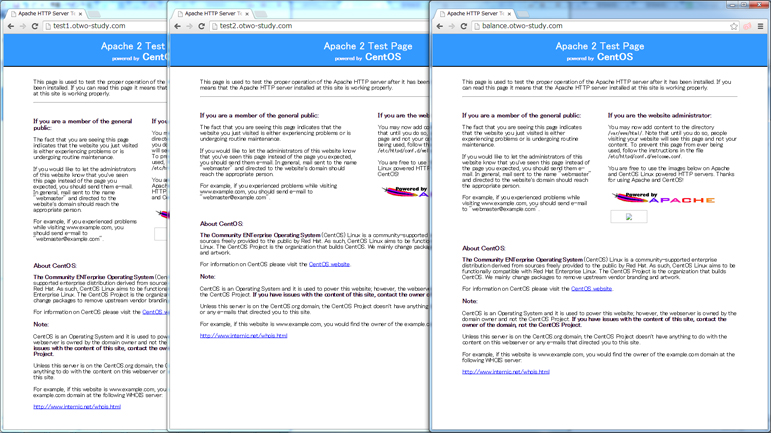
リバースプロキシの動作確認
ここまでの設定が上手くいっていれば以下の挙動になるはず。
- リバースプロキシのグローバルIPでアクセスするとリバースプロキシ上のnginxのwelcomeページが表示される
- test1.otwo-study.comでアクセスするとweb01のapacheのwelcomeページが表示される(webサーバのaccess_logをtailで確認)
- test2.otwo-study.comでアクセスするとweb02のapacheのwelcomeページが表示される(webサーバのaccess_logをtailで確認)
ロードバランサ
リバースプロキシの続きでロードバランサを構築しました。
同一ドメインのリクエストをweb01,web02にラウンドロビンで振り分けます。
ロードバランサの設定
nginxの設定ファイルでロードバランサの設定を行います。
# vi /etc/nginx/conf.d/balance.conf
balance.confの内容
upstream balance-otwo-study {
server 172.18.0.105;
server 172.18.0.132;
}
server {
listen 80;
server_name balance.otwo-study.com;
proxy_set_header Host $host;
proxy_set_header X-Forwarded-For $proxy_add_x_forwarded_for;
proxy_set_header X-Forwarded-Host $host;
proxy_set_header X-Forwarded-Server $host;
proxy_set_header X-Real-IP $remote_addr;
location / {
proxy_pass http://balance-otwo-study/;
}
}
upstreamで振分け対象のサーバを定義しています。
デフォルトは均等なラウンドロビンですが、
サーバ毎の重み付けや、ipのハッシュ値、接続数、セッションなどによる振分けが可能です。
# vi /etc/nginx/nginx.conf
nginx.confの変更内容
include /etc/nginx/conf.d/balance.conf;
balance.confをincludeします。
# /etc/init.d/nginx restart
名前解決の設定
先ほどと同じくクライアントのhostsファイルを編集して名前解決を行います。
hostsの追記内容
xxx.xxx.xxx.xxx balance.otwo-study.com
ロードバランサの動作確認
ここまでの設定が上手くいっていれば
balance.otwo-study.comでアクセスするとweb01とweb02にラウンドロビンでリクエストが振り分けられます。
(webサーバのaccess_logをtailで確認)
全部同じ画面で見た目分からないですけど、ちゃんと動いてます^^;
nginx楽チンっすね!!
オーツーではこんな感じで毎週1時間程度、勉強会を開催しています。
また別の勉強会の内容も記事にしようと思ってるので見に来てやってくださいm(_ _)m
ではでは。


 ピックアップ